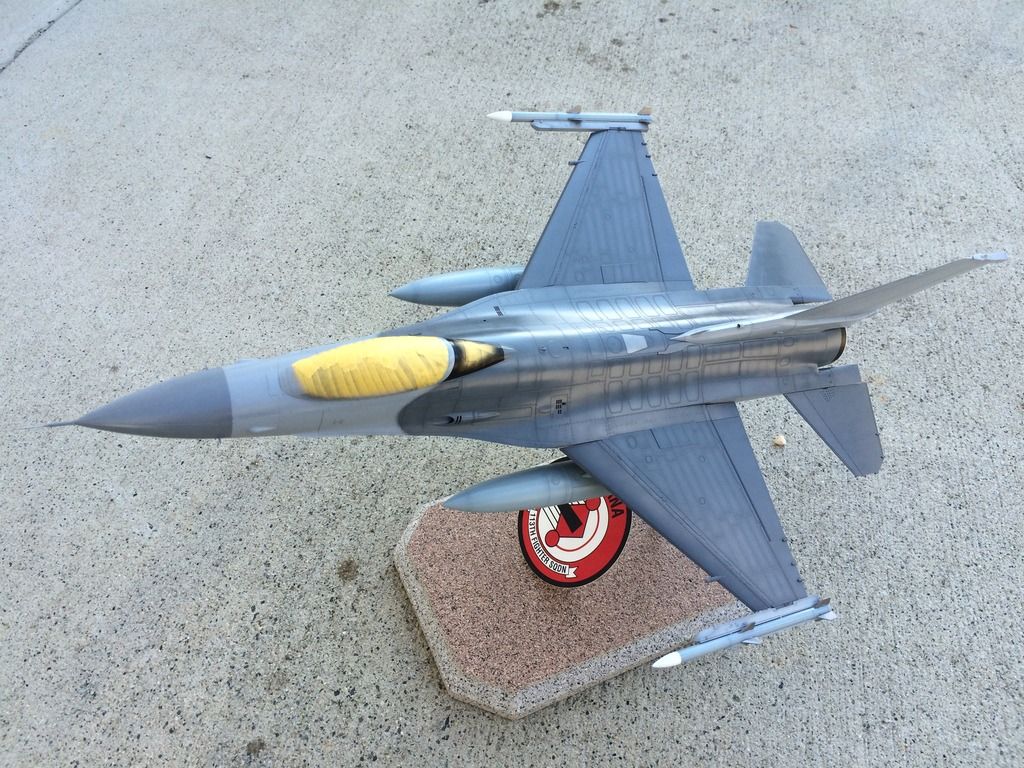
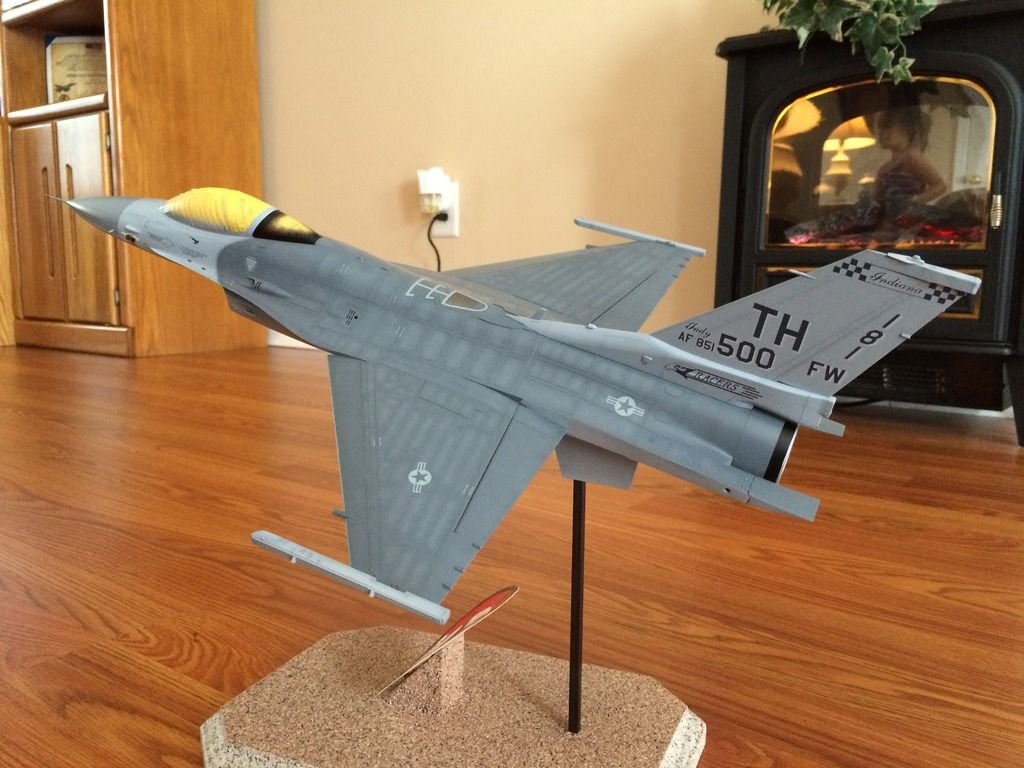
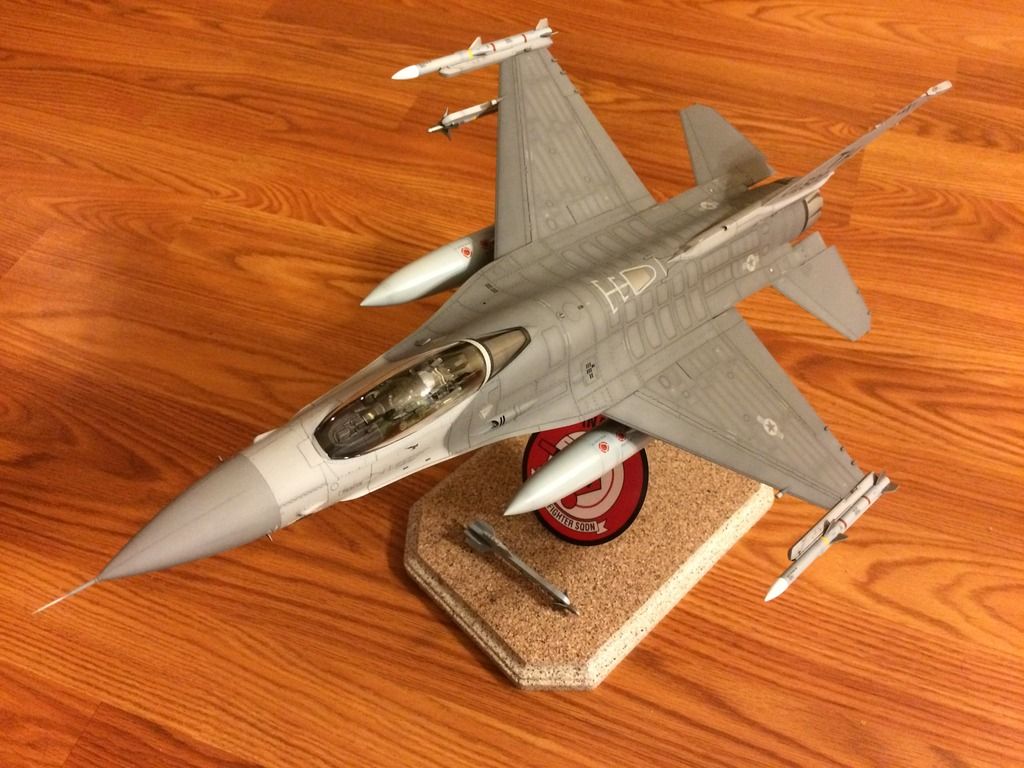
1/32 Tamiya F-16C Blk 30 181st FW.


- Elite 5K

- Posts: 6001
- Joined: 10 Mar 2006, 01:24
- Location: Nashua NH USA
simply amazing! What did you do to get those panel lines to pop like that? I see you painted them black initially but how did that not get covered over with the next paint coat?
"Spurts"
-Pilot
-Aerospace Engineer
-Army Medic
-FMS Systems Engineer
-PFD Systems Engineer
-PATRIOT Systems Engineer
-Pilot
-Aerospace Engineer
-Army Medic
-FMS Systems Engineer
-PFD Systems Engineer
-PATRIOT Systems Engineer
- Elite 3K

- Posts: 3151
- Joined: 02 Feb 2014, 15:43
Has to be one of the best I've ever seen - looks like a pro! 
- Newbie

- Posts: 15
- Joined: 05 Jun 2013, 14:10
- Location: Dallas NC. "Just outside of Charlotte"
Thanks for the comments Gentlemen!
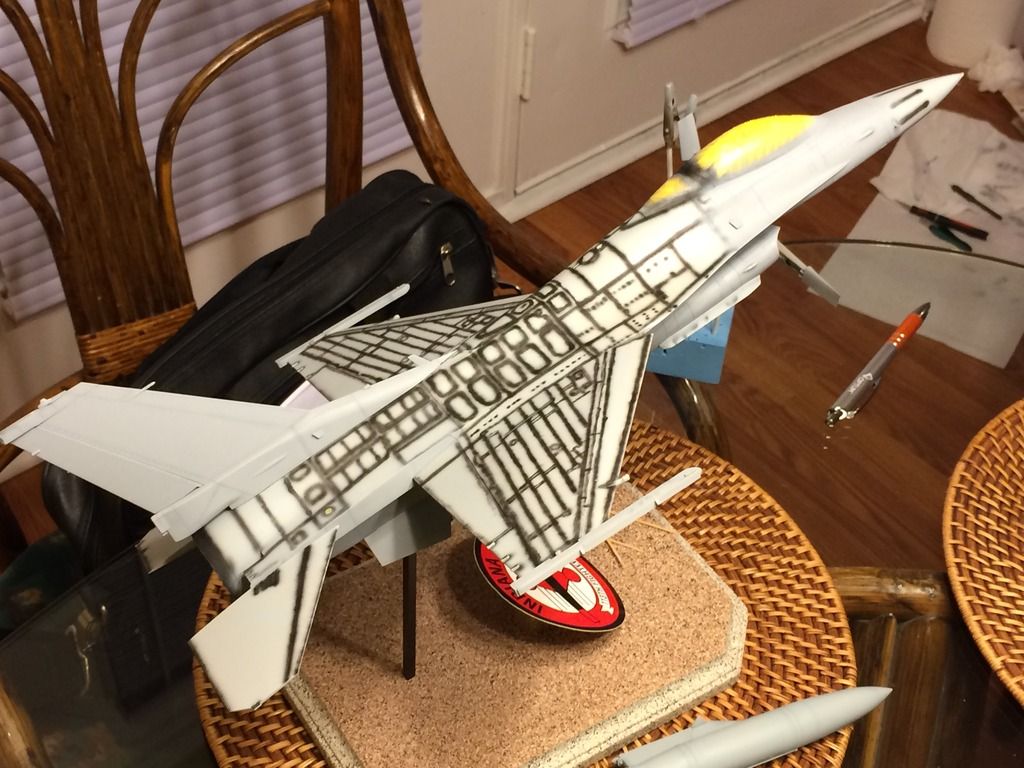
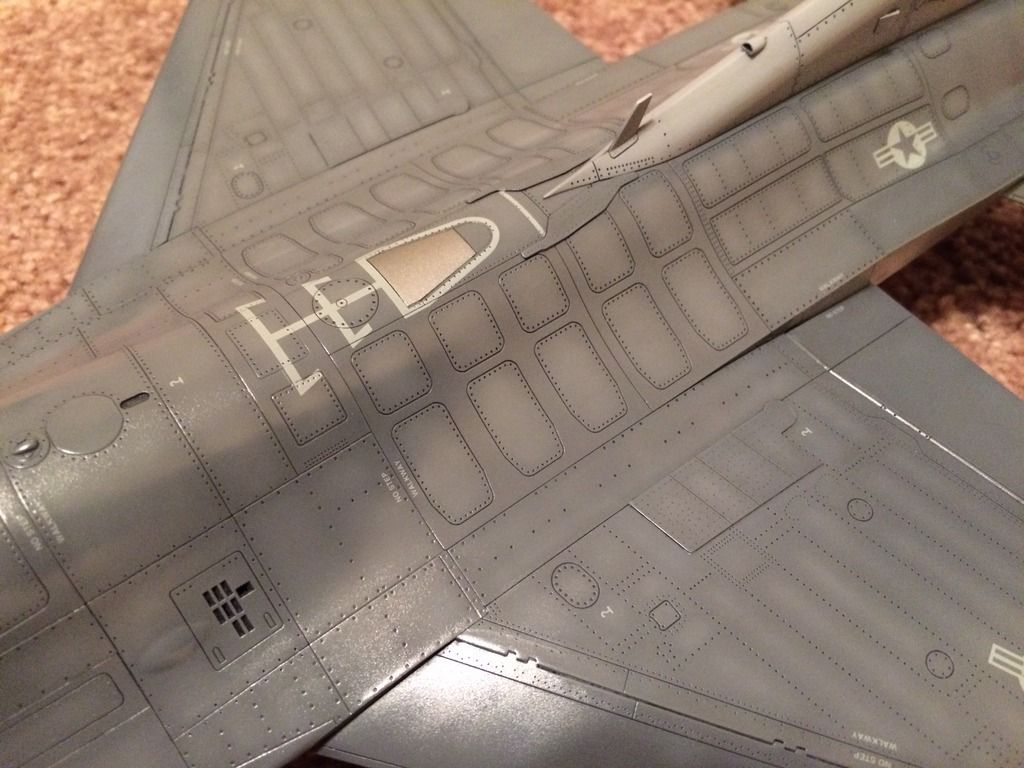
The photo showing all of the black lines on the model is, A technique referred to as Pre Shading
The idea is to spray the panel lines with a dark color and add the base color over top in thin coats to the point where the black is barely visible. You are basically creating a shadowing effect with the panel lines.
Here are a couple of photos showing the beginning stages of airbrushing the Viper
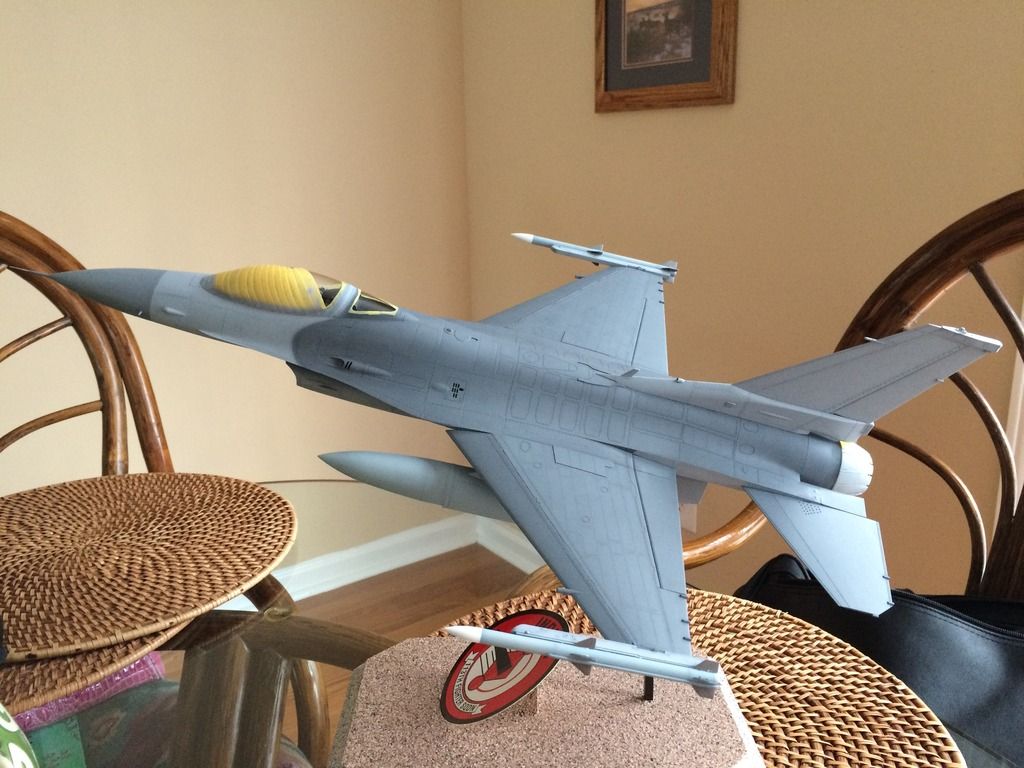
After the Viper has been base painted, I go back and spray inside the panels with the base color lightened a tad, This method is referred to as Post Shading.
Once your happy with the painted model, it's time to spray the entire model with a gloss coat.
This is a very important step for applying the decals. The gloss will help hide the carrier film around the edges of the decal and help make the decal appear to be painted on.
Using decal solvents really helps getting the decal to nestle down into any recessed detail you are applying the decal over top of. Once all of the decals are applied, it's best to seal the decals with a gloss.
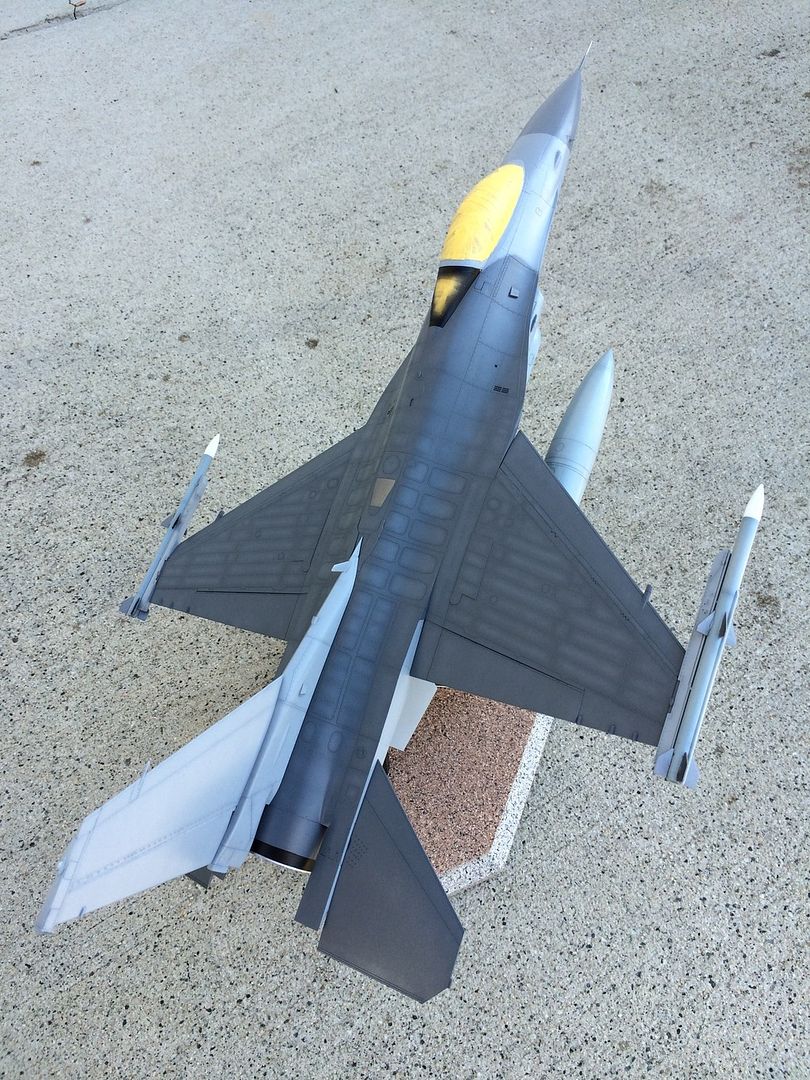
To get the recessed detail to Pop! Is a technique called washing.
I use an oil wash mainly, But there are several types of washes out there in the scale modeling world.
I prefer to use oils because I feel like I have more control applying it to the recessed detail.
When I say oils, I'm referring to Artist oil paints that you purchase in a tube, Black and White are my go to colors!
I mix the two colors til I end up with a dark gray "Almost black" paint...A little goes a long way! So don't mix up too much!
Thin the oil paint with odorless turpentine til it's about as thick as milk.
Brush on in small increments starting foward and working back
Cleaning off the excess oil paint with paper towels and Q-tips. As you wipe the model the oil paint should stay in the recessed detail "panel lines" and should look like this
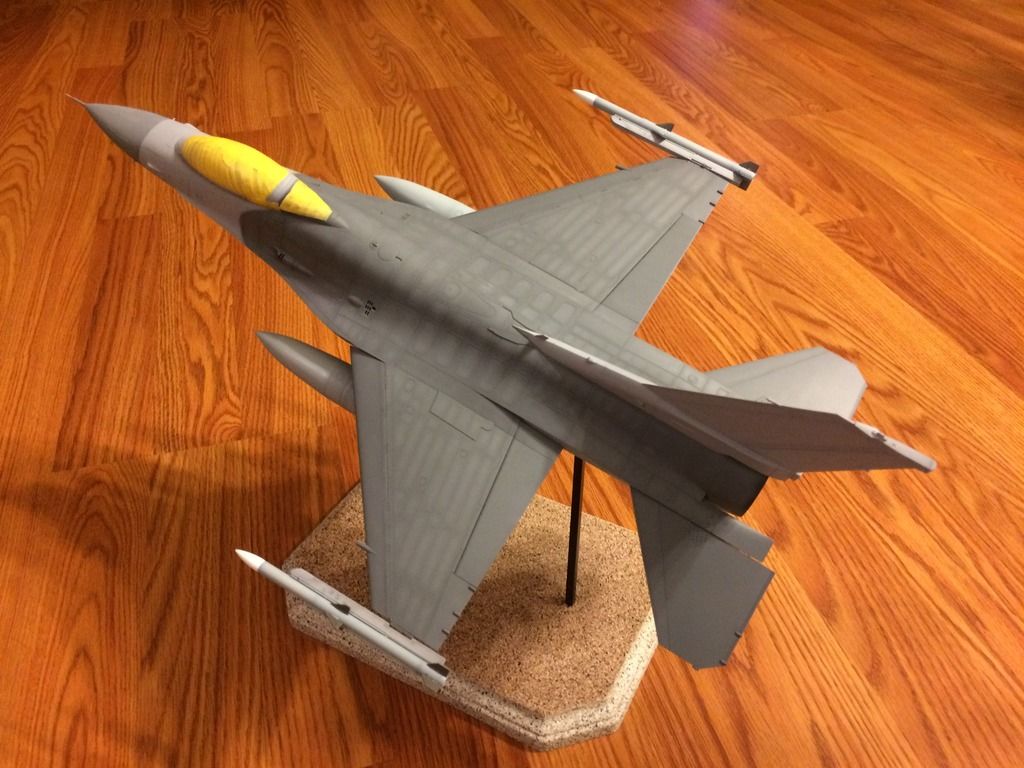
Once all of the excess oil paint has been cleaned off and you're happy with the work, the final step is to spray a flat coat to dull the paint back down.
Sorry to be so long winded and hope this will help!
Mike
The photo showing all of the black lines on the model is, A technique referred to as Pre Shading
The idea is to spray the panel lines with a dark color and add the base color over top in thin coats to the point where the black is barely visible. You are basically creating a shadowing effect with the panel lines.
Here are a couple of photos showing the beginning stages of airbrushing the Viper


After the Viper has been base painted, I go back and spray inside the panels with the base color lightened a tad, This method is referred to as Post Shading.

Once your happy with the painted model, it's time to spray the entire model with a gloss coat.


This is a very important step for applying the decals. The gloss will help hide the carrier film around the edges of the decal and help make the decal appear to be painted on.

Using decal solvents really helps getting the decal to nestle down into any recessed detail you are applying the decal over top of. Once all of the decals are applied, it's best to seal the decals with a gloss.
To get the recessed detail to Pop! Is a technique called washing.
I use an oil wash mainly, But there are several types of washes out there in the scale modeling world.
I prefer to use oils because I feel like I have more control applying it to the recessed detail.
When I say oils, I'm referring to Artist oil paints that you purchase in a tube, Black and White are my go to colors!
I mix the two colors til I end up with a dark gray "Almost black" paint...A little goes a long way! So don't mix up too much!
Thin the oil paint with odorless turpentine til it's about as thick as milk.
Brush on in small increments starting foward and working back
Cleaning off the excess oil paint with paper towels and Q-tips. As you wipe the model the oil paint should stay in the recessed detail "panel lines" and should look like this

Once all of the excess oil paint has been cleaned off and you're happy with the work, the final step is to spray a flat coat to dull the paint back down.

Sorry to be so long winded and hope this will help!
Mike
- Elite 5K
- Posts: 6001
- Joined: 10 Mar 2006, 01:24
- Location: Nashua NH USA
WOW! Thanks for the tips!
"Spurts"
-Pilot
-Aerospace Engineer
-Army Medic
-FMS Systems Engineer
-PFD Systems Engineer
-PATRIOT Systems Engineer
-Pilot
-Aerospace Engineer
-Army Medic
-FMS Systems Engineer
-PFD Systems Engineer
-PATRIOT Systems Engineer
8 posts
|Page 1 of 1
Who is online
Users browsing this forum: No registered users and 4 guests